
Instinctive
Instinctive
FBG Bowl League 0004 - Shark Pool Only
Want a Spicier Take? Need a Little Encouragement? Try Changing the Tone of your Report!
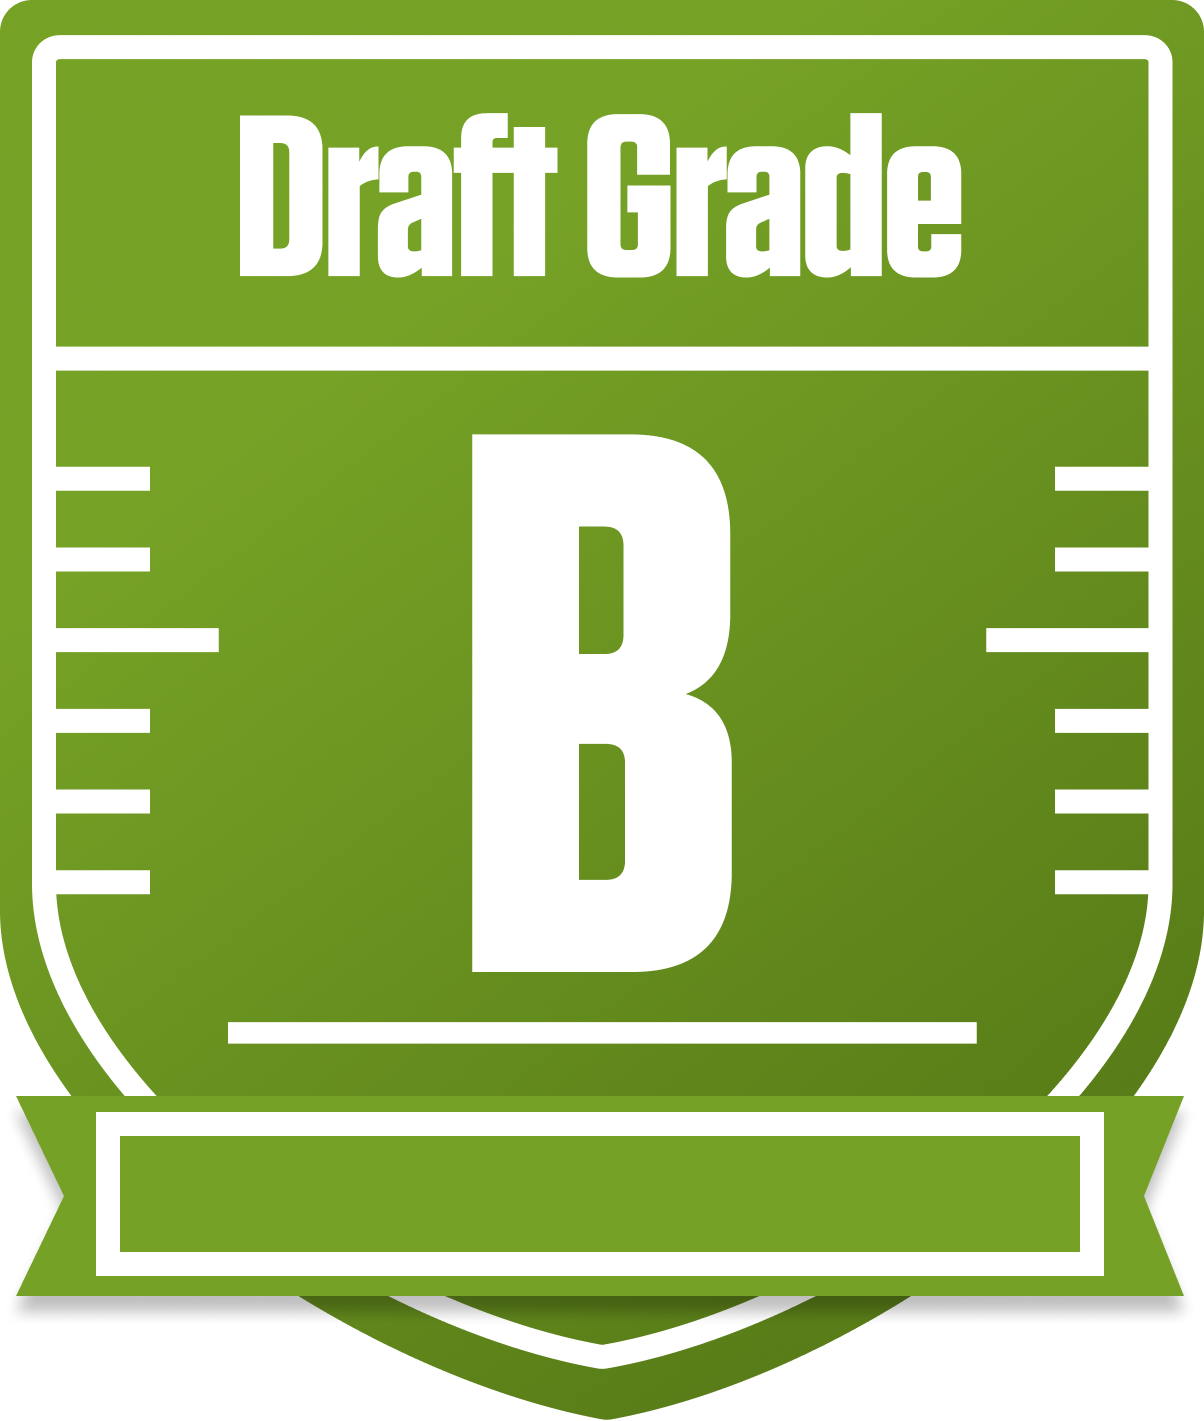
Instinctive's Draft Report Card Is Here - Let's Break Down How You Did in the FBG Bowl League 0004 - Shark Pool Only
Well, howdy, Instinctive! You’ve put together a solid B-grade squad in this 12-team, full PPR redraft league, and that’s no small feat. With a balanced roster that leans on strong running backs and wide receivers, you’re well-positioned to make a playoff push, boasting a respectable average playoff chance just shy of 50%. The league’s standard roster settings with one QB, two RBs, three WRs, and two flex spots mean your depth and starters both need to perform, and you’ve got a good mix of both.
Your team’s overall grade reflects a sturdy starting lineup with a bench that can hold its own, especially at defense and running back. But don’t get too comfortable just yet—there are some glaring weaknesses, particularly at tight end and bench wide receiver depth, that could trip you up down the stretch. We’ll dive into those details and highlight some strategic moves to help you reach for the stars and secure that playoff berth.
So buckle up, because this breakdown will spotlight your team’s heroes, expose a few villains, and offer some savvy advice to keep you competitive all season long.
Your Grades By Position
Quarterback


Running Back


Wide Receiver

Tight End
Team Defense
Quarterback
Running Back
Wide Receiver
Tight End
Team Defense
Playoff Chances
{"type":"doughnut","data":{"labels":["Make the Playoffs","Miss the Playoffs","Make the Playoffs","Miss the Playoffs","Make the Playoffs","Miss the Playoffs"],"datasets":[{"label":"Great Management","data":[69,31],"backgroundColor":["#3b82f6","#6c757d"],"borderWidth":3,"borderColor":"#fff"},{"label":"Good Management","data":[59,41],"backgroundColor":["#22c55e","#6c757d"],"borderWidth":3,"borderColor":"#fff"},{"label":"Average Management","data":[48,52],"backgroundColor":["#fbbf24","#6c757d"],"borderWidth":3,"borderColor":"#fff"}]},"options":{"responsive":true,"maintainAspectRatio":false,"backgroundColor":"transparent","cutout":"40%","plugins":{"legend":{"display":false},"tooltip":{"enabled":true,"backgroundColor":"rgba(0,0,0,0.8)","titleColor":"#fff","bodyColor":"#fff"}},"elements":{"arc":{"borderWidth":3,"borderColor":"#fff"}}}}
Position Upside Potential
Breakout potential by position - more stars indicate greater upside opportunity