
Juice5050
Juice5050
Fooseball A New Saga
Want a Spicier Take? Need a Little Encouragement? Try Changing the Tone of your Report!


Juice5050's Draft Report Card Is Here - Let's Break Down How You Did in Fooseball A New Saga
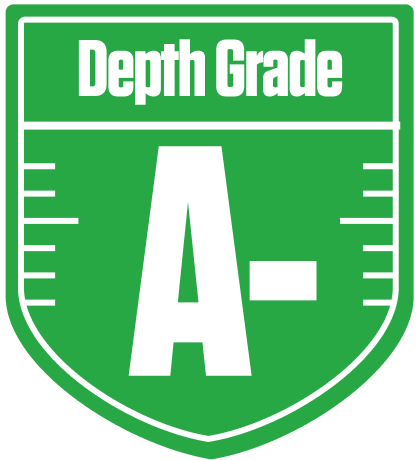
Well, well, well, Juice5050 has put together a strong A-grade squad in this 8-team redraft league, and that’s no small feat! With full PPR scoring and a single QB slot, your team’s construction leans heavily on balanced depth and star power, especially at running back and wide receiver. Your overall grade reflects a team built to compete deep into the playoffs, boasting a solid 60-77% chance to make a run this season.
This report dives into your draft results, highlighting where you’ve stacked up your strengths and where some vulnerabilities might lurk. From a powerhouse RB group to a WR corps that’s a bit uneven but loaded on the bench, we’ll explore how your roster fits the league’s unique settings and what moves could push you over the top. Buckle up, because Juice5050 is primed for a fun ride, but there’s always room to tighten the screws and maximize that playoff potential!
Your Grades By Position
Quarterback


Running Back
Wide Receiver

Tight End
Kicker

Linebacker

Defensive Tackle
Defensive End

Cornerback
Safety
Quarterback
Running Back
Wide Receiver
Tight End
Kicker
Linebacker
Defensive Tackle
Defensive End
Cornerback
Safety
Playoff Chances
{"type":"doughnut","data":{"labels":["Make the Playoffs","Miss the Playoffs","Make the Playoffs","Miss the Playoffs","Make the Playoffs","Miss the Playoffs"],"datasets":[{"label":"Great Management","data":[77,23],"backgroundColor":["#3b82f6","#6c757d"],"borderWidth":3,"borderColor":"#fff"},{"label":"Good Management","data":[70,30],"backgroundColor":["#22c55e","#6c757d"],"borderWidth":3,"borderColor":"#fff"},{"label":"Average Management","data":[60,40],"backgroundColor":["#fbbf24","#6c757d"],"borderWidth":3,"borderColor":"#fff"}]},"options":{"responsive":true,"maintainAspectRatio":false,"backgroundColor":"transparent","cutout":"40%","plugins":{"legend":{"display":false},"tooltip":{"enabled":true,"backgroundColor":"rgba(0,0,0,0.8)","titleColor":"#fff","bodyColor":"#fff"}},"elements":{"arc":{"borderWidth":3,"borderColor":"#fff"}}}}
Position Upside Potential
Breakout potential by position - more stars indicate greater upside opportunity