
Guide Me Ja Rule
Guide Me Ja Rule
All Procrastinators
Want a Spicier Take? Need a Little Encouragement? Try Changing the Tone of your Report!

Guide Me Ja Rule's Draft Report Card in the All Procrastinators League - Strengths, Weaknesses & Playoff Outlook
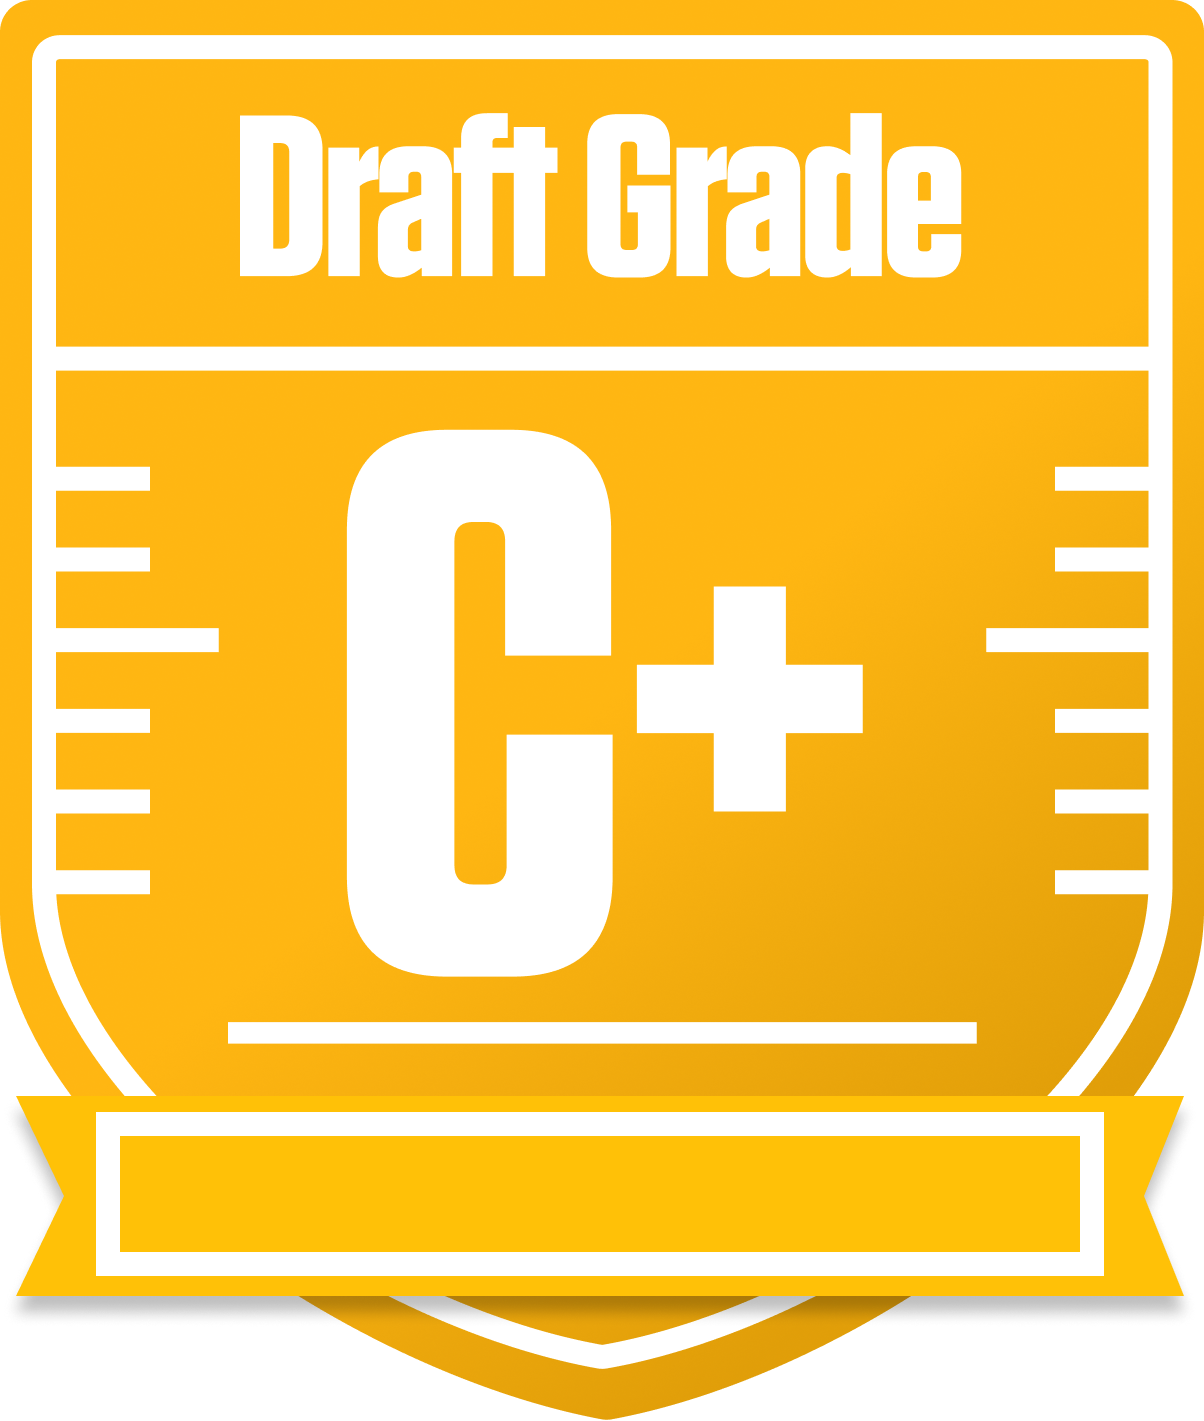
Welcome to the Guide Me Ja Rule fantasy football draft report for the All Procrastinators, a 12-team redraft league with standard roster settings including 1 QB, 2 RBs, 2 WRs, 2 flex spots, and scoring that rewards return yards. Your team earned a solid overall grade of C+, reflecting a balanced but imperfect roster that shows flashes of brilliance and areas needing attention. With a strong starting quarterback and wide receiver group but some glaring holes at tight end and running back starters, your squad is a mixed bag that could surprise or struggle depending on how the season unfolds.
Your playoff chances hover in the 40-60% range, meaning you’re very much in the hunt but can’t afford to be complacent. The league’s redraft format means your draft choices are critical, and your bench depth will be key to navigating injuries and bye weeks. This report will break down your team’s positional strengths and weaknesses, highlight bye week conflicts, and offer strategic recommendations to help you maximize your chances of making a deep playoff run in this competitive league.
Your Grades By Position
Quarterback


Running Back

Wide Receiver

Team Defense

Kicker
Tight End
Quarterback
Running Back
Wide Receiver
Team Defense
Kicker
Tight End
Playoff Chances
{"type":"doughnut","data":{"labels":["Make the Playoffs","Miss the Playoffs","Make the Playoffs","Miss the Playoffs","Make the Playoffs","Miss the Playoffs"],"datasets":[{"label":"Great Management","data":[61,39],"backgroundColor":["#3b82f6","#6c757d"],"borderWidth":3,"borderColor":"#fff"},{"label":"Good Management","data":[51,49],"backgroundColor":["#22c55e","#6c757d"],"borderWidth":3,"borderColor":"#fff"},{"label":"Average Management","data":[41,59],"backgroundColor":["#fbbf24","#6c757d"],"borderWidth":3,"borderColor":"#fff"}]},"options":{"responsive":true,"maintainAspectRatio":false,"backgroundColor":"transparent","cutout":"40%","plugins":{"legend":{"display":false},"tooltip":{"enabled":true,"backgroundColor":"rgba(0,0,0,0.8)","titleColor":"#fff","bodyColor":"#fff"}},"elements":{"arc":{"borderWidth":3,"borderColor":"#fff"}}}}
Position Upside Potential
Breakout potential by position - more stars indicate greater upside opportunity