
Iron City
Iron City
CDBFFL
Want a Spicier Take? Need a Little Encouragement? Try Changing the Tone of your Report!
Iron City Draft Report Card Is Here - Let’s Break Down How You Did
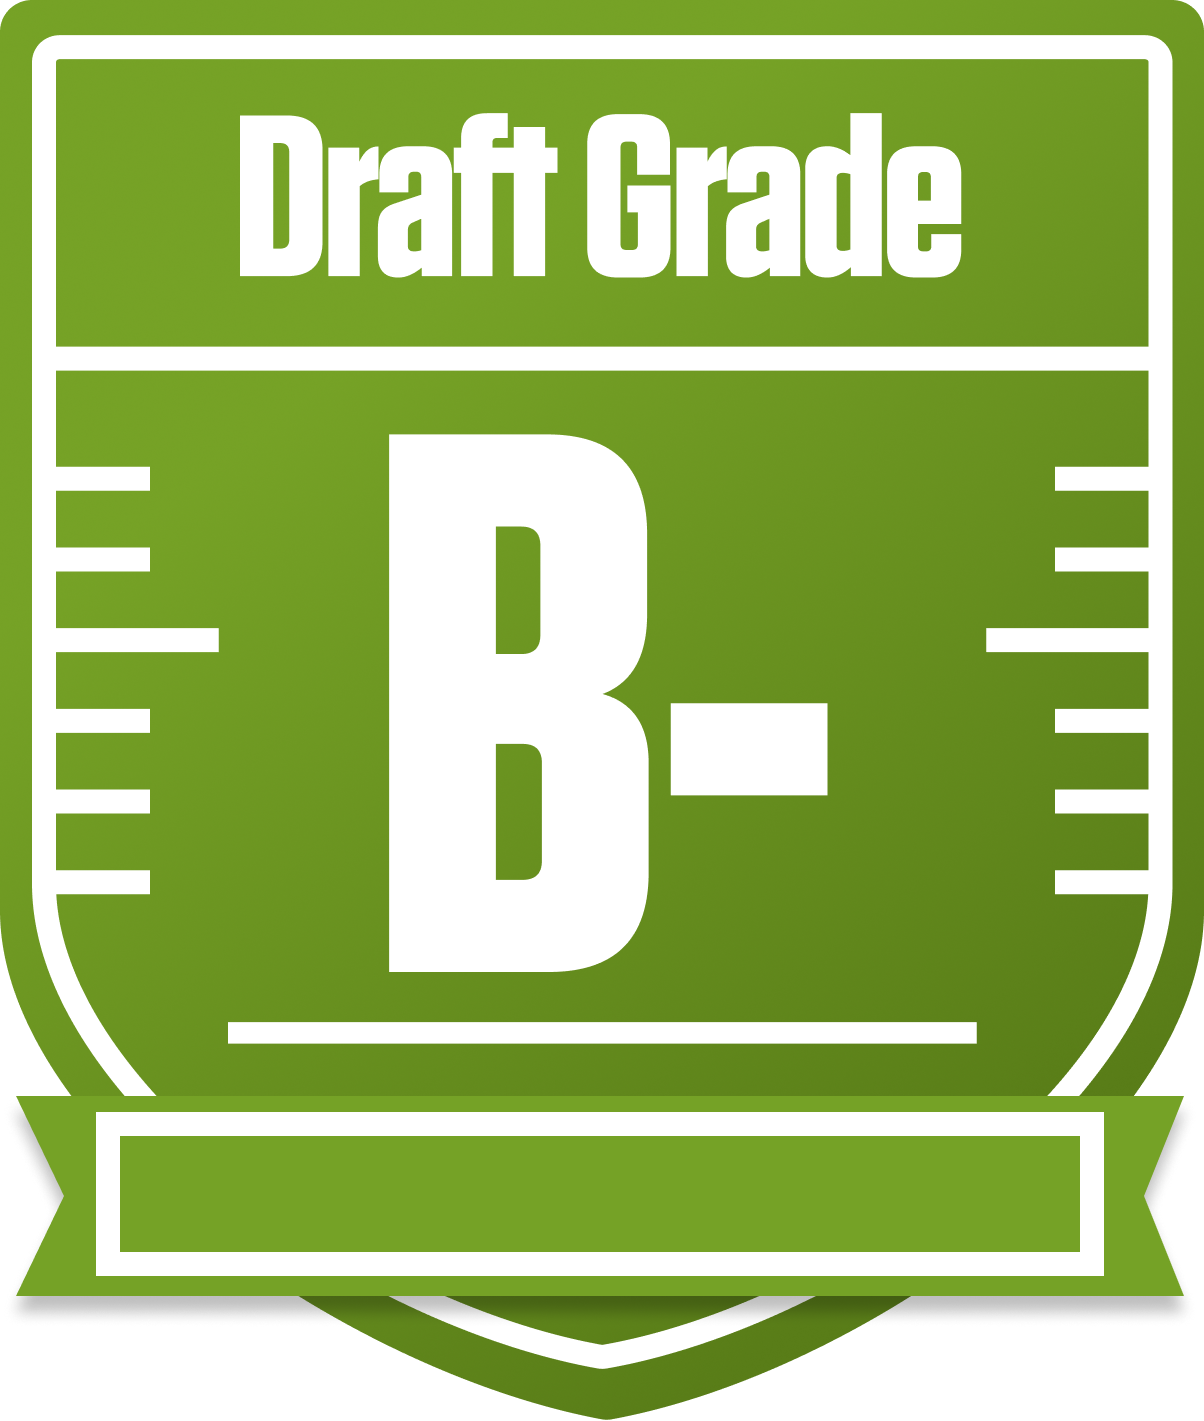
Welcome to your personalized draft analysis for Iron City in the CDBFFL, a 12-team half-PPR redraft league. Your team earned a respectable overall grade of B-, showing solid construction with some clear strengths and areas to improve. The league’s standard roster settings—one QB, two RBs, two WRs, one TE, and a flex—mean every starter spot counts, and your team’s balance between starters and bench depth will be key to navigating the season.
Your projected points and positional grades reveal a team built on a strong WR corps and a deep RB bench, but with some concerns at QB and TE. Playoff chances hover in the middle range, so strategic moves and savvy weekly management will be crucial. We’ll dive into your team’s standout assets, potential pitfalls, and how to leverage Footballguys tools to maximize your chances of making a deep run in this competitive league.
Get ready for a breakdown that highlights your team’s heroes, villains, and the moves that could turn the tide in your favor this season.
Your Grades By Position
Quarterback


Running Back

Wide Receiver

Tight End
Team Defense
Kicker
Quarterback
Running Back
Wide Receiver
Tight End
Team Defense
Kicker
Playoff Chances
{"type":"doughnut","data":{"labels":["Make the Playoffs","Miss the Playoffs","Make the Playoffs","Miss the Playoffs","Make the Playoffs","Miss the Playoffs"],"datasets":[{"label":"Great Management","data":[63,37],"backgroundColor":["#3b82f6","#6c757d"],"borderWidth":3,"borderColor":"#fff"},{"label":"Good Management","data":[53,47],"backgroundColor":["#22c55e","#6c757d"],"borderWidth":3,"borderColor":"#fff"},{"label":"Average Management","data":[42,58],"backgroundColor":["#fbbf24","#6c757d"],"borderWidth":3,"borderColor":"#fff"}]},"options":{"responsive":true,"maintainAspectRatio":false,"backgroundColor":"transparent","cutout":"40%","plugins":{"legend":{"display":false},"tooltip":{"enabled":true,"backgroundColor":"rgba(0,0,0,0.8)","titleColor":"#fff","bodyColor":"#fff"}},"elements":{"arc":{"borderWidth":3,"borderColor":"#fff"}}}}
Position Upside Potential
Breakout potential by position - more stars indicate greater upside opportunity