
Runaway Trains
Runaway Trains
CDBFFL
Want a Spicier Take? Need a Little Encouragement? Try Changing the Tone of your Report!


Runaway Trains Draft Report Card Is Here - Let's Break Down How You Did
Howdy, fantasy football fan! The Runaway Trains have rolled through the CDBFFL draft with an impressive overall grade of A, showing a well-balanced roster ready to rumble in this 12-team half-PPR redraft league. With just one QB, two RBs, two WRs, one TE, and a flex spot, plus seven bench players, this team’s construction leans heavily on strong starters and a solid bench, especially at tight end and wide receiver. The league’s half-PPR scoring and no superflex format mean your QB and skill positions need to consistently deliver, and your team’s projected points reflect that strength.
Your playoff chances look promising, with a good shot at 71% and a great shot at 78%, so the postseason is well within reach if things break your way. But as we’ll see, there are some glaring weaknesses lurking in the running back depth that could trip you up. Stick around for the breakdown below where we’ll highlight your team’s top assets, potential pitfalls, and strategic moves to keep that runaway train on the tracks all season long.
Your Grades By Position
Quarterback


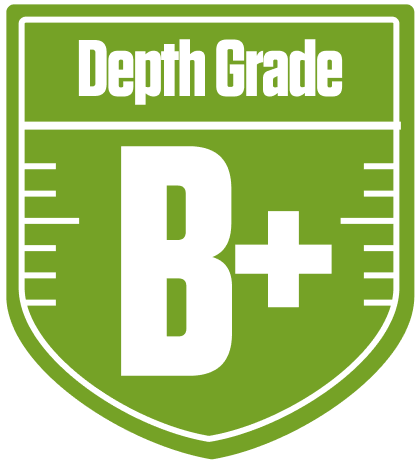
Running Back

Wide Receiver


Tight End
Team Defense
Kicker
Quarterback
Running Back
Wide Receiver
Tight End
Team Defense
Kicker
Playoff Chances
{"type":"doughnut","data":{"labels":["Make the Playoffs","Miss the Playoffs","Make the Playoffs","Miss the Playoffs","Make the Playoffs","Miss the Playoffs"],"datasets":[{"label":"Great Management","data":[78,22],"backgroundColor":["#3b82f6","#6c757d"],"borderWidth":3,"borderColor":"#fff"},{"label":"Good Management","data":[71,29],"backgroundColor":["#22c55e","#6c757d"],"borderWidth":3,"borderColor":"#fff"},{"label":"Average Management","data":[61,39],"backgroundColor":["#fbbf24","#6c757d"],"borderWidth":3,"borderColor":"#fff"}]},"options":{"responsive":true,"maintainAspectRatio":false,"backgroundColor":"transparent","cutout":"40%","plugins":{"legend":{"display":false},"tooltip":{"enabled":true,"backgroundColor":"rgba(0,0,0,0.8)","titleColor":"#fff","bodyColor":"#fff"}},"elements":{"arc":{"borderWidth":3,"borderColor":"#fff"}}}}
Position Upside Potential
Breakout potential by position - more stars indicate greater upside opportunity