
The Commish
The Commish
CDBFFL
Want a Spicier Take? Need a Little Encouragement? Try Changing the Tone of your Report!

Your Draft Report Card Is Here, The Commish - Let's Break Down How You Did
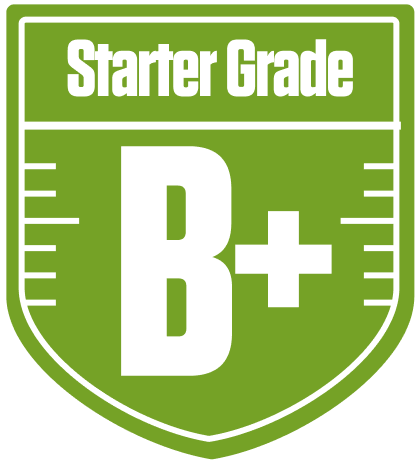
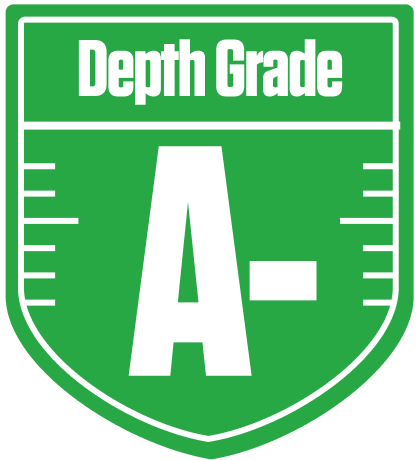
Welcome to your personalized fantasy report, The Commish! In this 12-team half-PPR redraft league, your squad earned a solid B+ overall grade, showing you’ve got a competitive roster that can make some noise this season. Your starters are graded well, especially at wide receiver and tight end, while your bench depth shines particularly at running back. This balance gives you a strong foundation to navigate the ups and downs of the fantasy grind.
However, there are some clear areas to watch, especially at quarterback and kicker, where your grades dip significantly. Your playoff chances hover around the middle of the pack, so strategic moves and savvy lineup management will be key to pushing into the upper tier. With a roster featuring stars like Justin Jefferson and George Kittle, plus some intriguing running back depth, you’re positioned to capitalize on your strengths while shoring up weaknesses. Let’s dive deeper into what makes your team tick and where you can sharpen your edge.
Your Grades By Position
Quarterback


Running Back

Wide Receiver
Tight End

Team Defense
Kicker
Quarterback
Running Back
Wide Receiver
Tight End
Team Defense
Kicker
Playoff Chances
{"type":"doughnut","data":{"labels":["Make the Playoffs","Miss the Playoffs","Make the Playoffs","Miss the Playoffs","Make the Playoffs","Miss the Playoffs"],"datasets":[{"label":"Great Management","data":[71,29],"backgroundColor":["#3b82f6","#6c757d"],"borderWidth":3,"borderColor":"#fff"},{"label":"Good Management","data":[62,38],"backgroundColor":["#22c55e","#6c757d"],"borderWidth":3,"borderColor":"#fff"},{"label":"Average Management","data":[51,49],"backgroundColor":["#fbbf24","#6c757d"],"borderWidth":3,"borderColor":"#fff"}]},"options":{"responsive":true,"maintainAspectRatio":false,"backgroundColor":"transparent","cutout":"40%","plugins":{"legend":{"display":false},"tooltip":{"enabled":true,"backgroundColor":"rgba(0,0,0,0.8)","titleColor":"#fff","bodyColor":"#fff"}},"elements":{"arc":{"borderWidth":3,"borderColor":"#fff"}}}}
Position Upside Potential
Breakout potential by position - more stars indicate greater upside opportunity